Using console as a mixing tool for AKAI MPC series
This example shows how console can be used with AKAI MPC series. Here, MPC1000 is used, but console can also be used in a similar fashion with other models, including those from manufacturers other than AKAI.
Objective
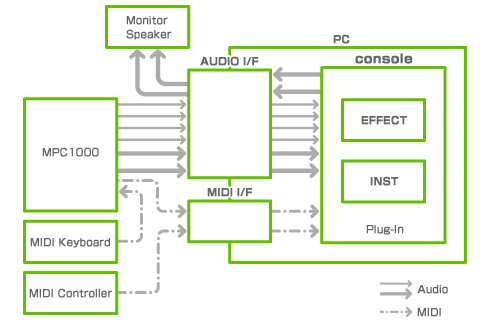
To take MPC's multi-out 6ch as input for console,
and process effects for each output system.
Since MPC is also a MIDI sequencer, we will work down all the way to
the final mixing, and combine output from MPC's multi-out with that
of a software synthesizer within console.
Equipment
| PC | B5 laptop PC (Pentium M 1.6GHz, 1GB RAM) |
|---|---|
| Audio/MIDI | interface RME Hammerfall DSP Multiface (Cardbus) |
| MIDI controller | KORG microKONTROL |
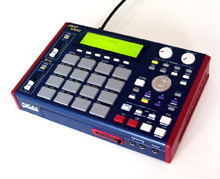
microKONTROL is used for real-time controlling of parameters for effects used within console, as well as to allow the software synthesizer to play.
Settings Details
Setting up console
You will need to perform basic setup of the project before starting on the routing.
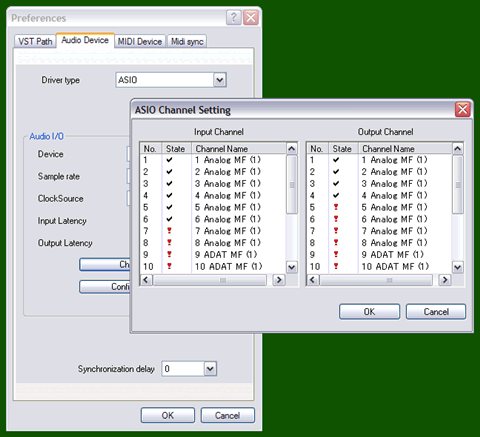
Audio interface setup
With multi-channel audio interfaces, disabling the unused channels will reduce the CPU load somewhat. This is usually configured on the driver's settings window.
Sync setup
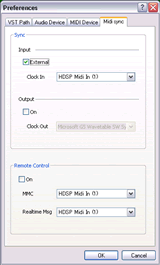 console can
be set to be a MIDI clock slave. You will want to configure the MIDI
sync settings if you are using plug-ins that require syncing of tempo
or sequence.
By enabling remote control, you can also sync the startup of console to
the startup of MPC.
While it is not always necessary to configure the sync settings, you
must sync the tempo on console and MPC if you wish
to use delay effects.
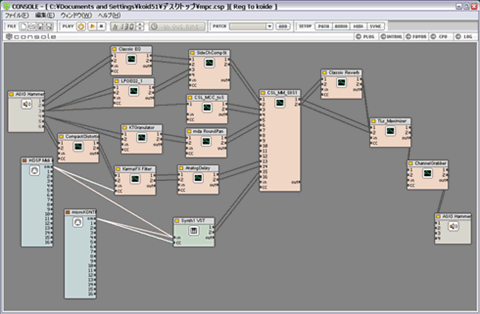
Device modules placement
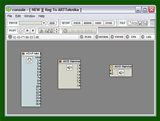 This
figure shows the patch editor with device I/O modules placed.
At this point, you can start loading and using plug-ins.
Routing in console
You can freely route various effects in console.
Here is a routing example for a key-in compression effect on a side chain (key-in) input of a compressor/gate.
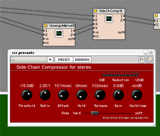
In this example, the source signals to be compressed are fed to ch.1/2, and the side chain signals are fed to ch.3/4.
This setup can be used, for example, to input a kick to the side chain and vary the reduction of the compression on the source.
Such routing is made simple by console's ability
to handle plug-ins freely.
[Plug-in Used]
Side Chain Gate/Expander Side Chain Compressor
https://www.geocities.jp/webmaster_of_sss/vst/
Exporting the mix
Once your mix is complete, export it to a WAV file.
TapeIt https://www.silverspike.com/
ChannelGrabber https://www.tobybear.de/p_utilbag.html
Inserting a plug-in like these before the final output will allow you
to export your mix to a WAV file.
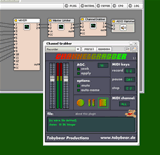
The export plug-in can be inserted at any point, even in multiple locations. You may wish to export in parallel and perform your final mixing on a DAW.
You can also use console to apply effects onto loops created with MPC, and record the output as a WAVE file which can then be imported back into MPC, much like when re-sampling.
Applications
console handles audio internally in 32bit float. When exporting to a WAV file, setting the quality to 32bit will prevent the loss of quality. Even when 16bit is sufficient, the additional 16bit will offer an advantage in later editing with a wave editor.
Furthermore, you may achieve better results by using a high-reliability wave editor to convert to 16bit, instead of simply down-converting with a WAV export plug-in.
* The sampling frequency will be determined by the project's settings.
There are also tools specialized for conversions.
https://www.voxengo.com/product/r8brain/
Tips
Controlling plug-in parameters
Using a MIDI controller will allow you to control plug-in parameters just as if you were controlling a hardware synthesizer.
You can also control the plug-ins from the MPC, i.e. by using MIDI CC.
Using software synthesizers
You can use synthesizer plug-ins to expand on the expressiveness of the MPC. To do this, input your MIDI sequence on the MPC, and then feed its MIDI output to console.
* This document does not guarantee that the plug-ins introduced herein will be fully functional with console.


